Autem vel eum iriure dolor in hendrerit in vulputate velit esse molestie consequat, vel illum dolore eu feugiat nulla facilisis at vero eros et dolore feugait.
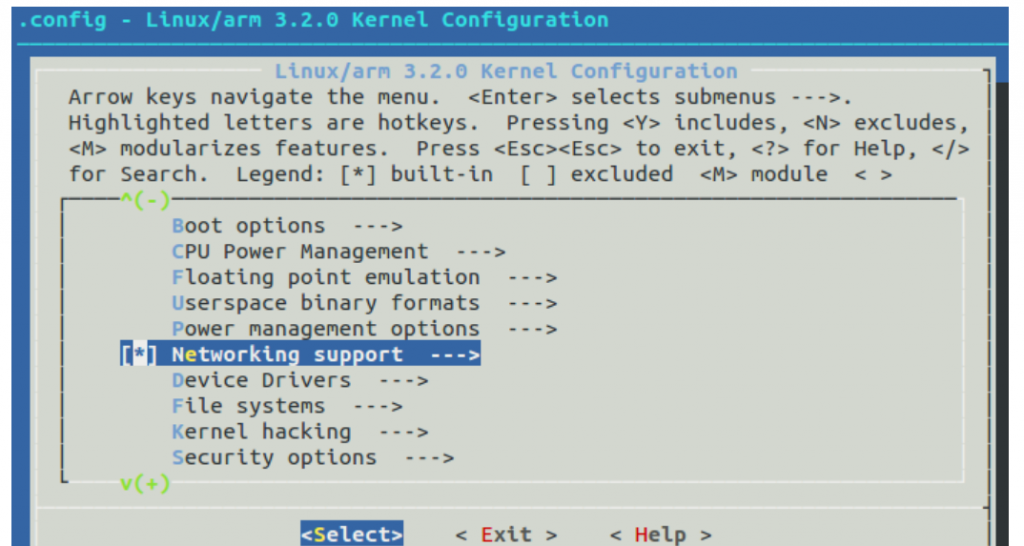
	Networking support
		Networking options
			TCP/IP networking
			IP: kernel level autoconfiguration
			[*] IP: DHCP support
			[*] IP: BOOTP support
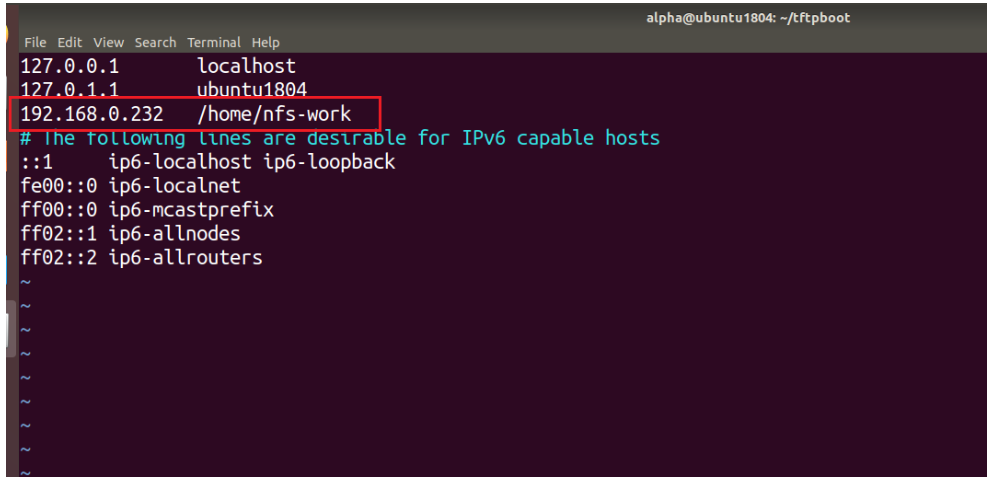
配置开启nfs服务
File systems
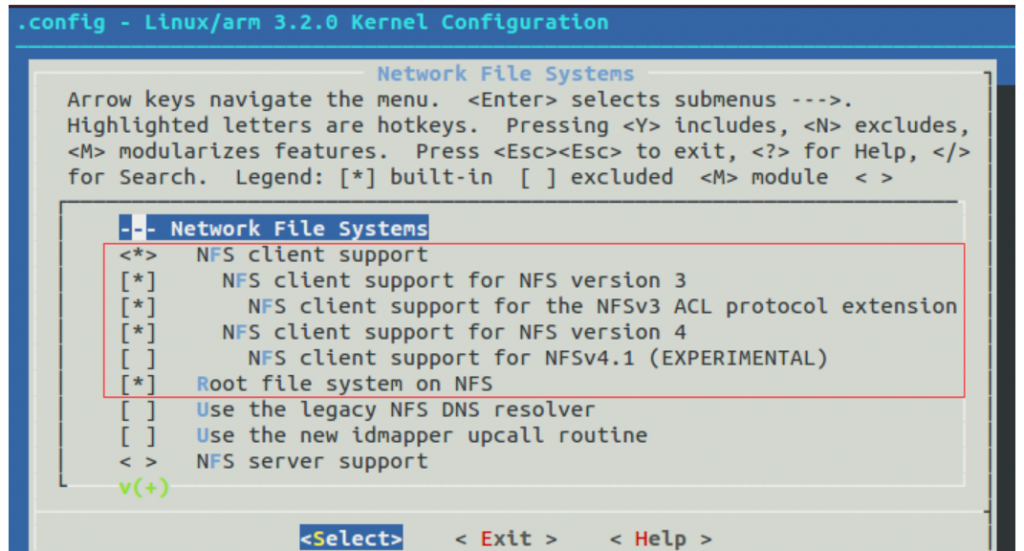
Network File Systems
<*> NFS client support
[*] NFS client support for NFS version 3
[*] NFS client support for the NFSv3 ACL protocol extension
[*] NFS client support for NFS version 4
[*] Root file system on NFS
  │ Symbol: LOCALVERSION [=]                                                                                                                                                                                   │
  │ Type  : string                                                                                                                                                                                             │
  │ Prompt: Local version - append to kernel release                                                                                                                                                           │
  │   Location:                                                                                                                                                                                                │
  │ (1) -> General setup                                                                                                                                                                                       │
  │   Defined at init/Kconfig:81                                                                                                                                                                               │
  │                                                                                                                                                                                                            │
  │                                                                                                                                                                                                            │
  │ Symbol: LOCALVERSION_AUTO [=n]                                                                                                                                                                             │
  │ Type  : boolean                                                                                                                                                                                            │
  │ Prompt: Automatically append version information to the version string                                                                                                                                     │
  │   Location:                                                                                                                                                                                                │
  │ (2) -> General setup                                                                                                                                                                                       │
  │   Defined at init/Kconfig:91                                                                                                                                                                               │
  │   Depends on: !COMPILE_TEST [=n]                                                                                                                                                                           │
  │
# CONFIG_LOCALVERSION and LOCALVERSION (if set)
res="${res}${CONFIG_LOCALVERSION}${LOCALVERSION}"

# scm version string if not at a tagged commit
if test "$CONFIG_LOCALVERSION_AUTO" = "y"; then
  # full scm version string
  res="$res$(scm_version)"
else
  # append a plus sign if the repository is not in a clean
  # annotated or signed tagged state (as git describe only
  # looks at signed or annotated tags - git tag -a/-s) and
  # LOCALVERSION= is not specified
  if test "${LOCALVERSION+set}" != "set"; then
    scm=$(scm_version --short)
   # res="$res${scm:++}"	//××××××××××××××注释掉这句话××××××××××××
  fi
fi