15AH, San Francisco

California, United States.

Send Your Mail At:

tianyingkejishe@sina.cn

Working Hours

Mon-Sat: 9.30am To 7.00pm

分类标题

Autem vel eum iriure dolor in hendrerit in vulputate velit esse molestie consequat, vel illum dolore eu feugiat nulla facilisis at vero eros et dolore feugait.

分类归档 Openwrt

【openwrt】为新设备添加OpenWrt支持

注:此文转载openwrt wiki

为了全面了解如何添加新设备支持,我们建议您查看一台新设备相关的最新的commit,摸清楚哪些文件发生了修改和如何修改它们。这些文件非常方便理解,我们只需要去打开查看就能理解。

一、通过实例进行学习

一个好方法是通过示例学习,我们通过搜索mt300a这个版型文件来,找出需要修改的文件,所以你可以这样做:

grep -lri mt300a target/

显示结果是添加新板所需的最少文件列表:

target/linux/ramips/base-files/etc/board.d/01_leds
target/linux/ramips/base-files/etc/board.d/02_network
target/linux/ramips/base-files/lib/upgrade/platform.sh
target/linux/ramips/base-files/lib/ramips.sh
target/linux/ramips/dts/GL-MT300A.dts
target/linux/ramips/image/mt7620.mk

二、重要文件

最重要的文件一般存放于以下目录:

/target/linux/<arch_name>/base-files/etc/…

该目录的文件和文件夹最终将会存放于设备固件的/etc/目录。

它一般包含下列的文件和文件夹:

  • …board.d/ 定义设备专用的默认硬件的脚本,如LED和网络接口。
  • …hotplug.d/ 定义设备专用的,在插入热插拔设备时自动运行的脚本
  • …init.d/ 定义设备专用的在启动时自动运行的脚本
  • …uci-defaults/ 定义设备专用的UCI默认设置
  • …diag.sh 定义设备显示的错误代码

/target/linux/<arch_name>/base-files/lib/…

该文件夹下的文件夹和文件对应固件中的/lib目录下文件夹和文件。

它的子文件夹和文件有:

  • …<arch_name>.sh 将阅读友好的设备名转化为脚本安全的设备名的脚本
  • …preinit/ 通用<arch_name>预初始化脚本
  • …upgrade/ 通用<arch_name>升级脚本

/target/linux/<arch_name>/base-files/sbin

该文件夹对应固件中的/sbin文件夹, 一般为通用的<arch_name> sbin脚本和工具.

/target/linux/<arch_name>/dts/

设备树源文件(Device tree source files, 简写为dts).

/target/linux/<arch_name>/image/

用于构建写入用镜像的设置文件。

/target/linux/<arch_name>/<board_name>/

设备专用的设置文件

/target/linux/<arch_name>/modules.mk

menuconfig中使用的架构专用(Arch-specific)配置文件

使新设备出现在make menuconfig中

在编辑了上述的文件后, 你需要对Makefile使用touch命令

touch target/linux/*/Makefile

三、补丁

子目录 patches-xxx 是对一个 目标版本xxx 的内核补丁.
它包含的文件名(’3个数字-全小写字母的简介.patch’)称含义如下:

0xx – 上游需要回退的内容补丁
1xx – 等待上游合并的代码补丁
2xx – 内核构建、配置和头文件的补丁
3xx – 用于特定体系结构的补丁
4xx – MTD相关的补丁(系统和设备方面)
5xx – 文件系统相关的补丁
6xx – 网络通用补丁
7xx – 网络物理层驱动补丁
8xx – 其他设备补丁
9xx – 未分类的其他补丁

所有的补丁发布都必须具有相比现阶段潜在的优势,如:

– 补丁必须具有合适明确的主题
– 必须有一个明确清晰的commit信息来解析补丁作出了什么样的改变
– 补丁必须包含一个签署人

四、镜像测试

测试镜像固件通过ramdisk镜像而不通过烧写到Flash。

make menuconfig配置中选择Target Images,然后再选择ramdisk选项。

这样将会编译生成一个kernel+inittramfs(内核加上内存根文件系统)的镜像文件,它的名字中将会包含initramfs。通过BootLoader的tftp功能可以将这个镜像文件导入到设备,这样可以在不需要flash文件系统的支持下进行启动。

1、小窍门

使用目标设备中的shell

为了获取到某个你感兴趣的OpenWrt设备的端口的相关数据,需要进行shell访问。但是大多数设备都没有提供使用telnet或者ssh连接shell的方法。

通过PING或者NTP功能进入shell

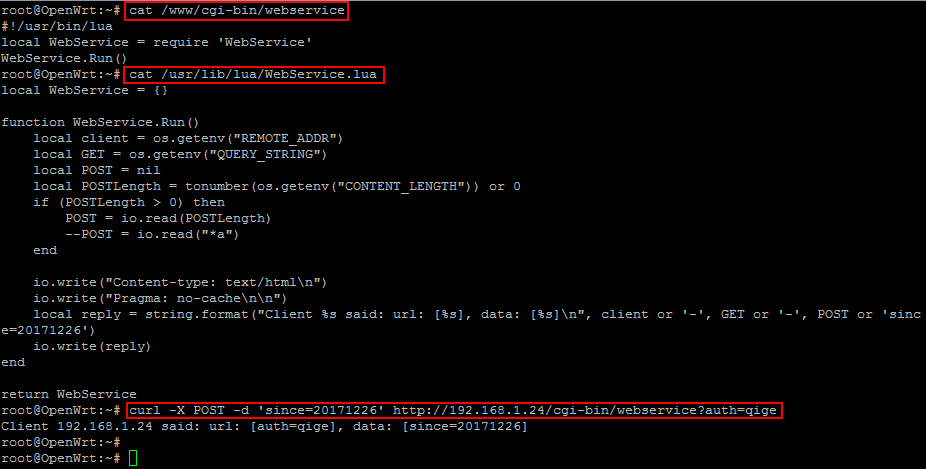
某些路由器提供ping测试或NTP服务器配置,并且可能无法正确清理用户输入。尝试输入shell脚本,看看您是否幸运。您可能需要一些JavaScript知识才能禁用客户端输入验证。

使用telnetd
$( /bin/busybox telnetd -l/bin/sh -p23 & )

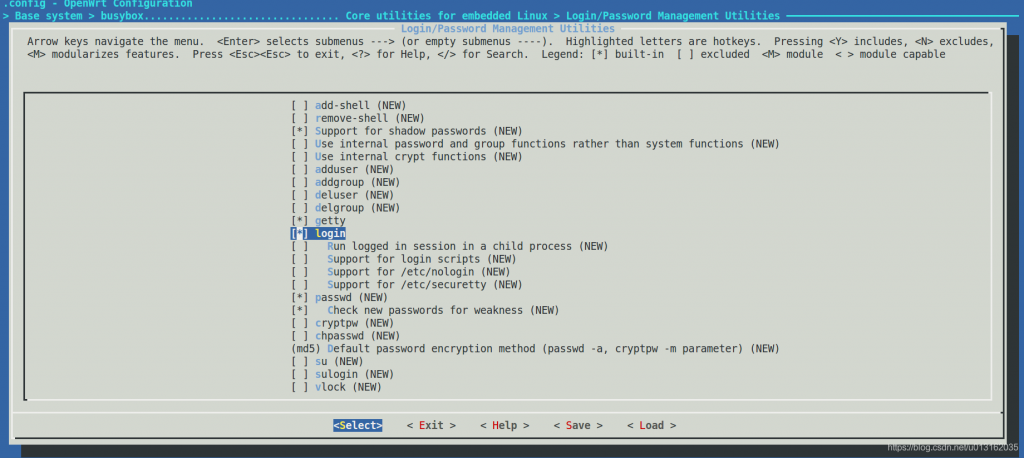
如果需要远程登录,请使用HTTP获取密码哈希或使用“sed”删除/更改默认密码

$( cp /etc/shadow /www )
$( cp /etc/passwd /www )

然后尝试将他们下载到您的电脑并且破解哈希密码。

降级固件

某些路由器可能会在启动之初尝试从特定的专用IP下载固件文件(例如TP-Link Archer C2 AC750),从而允许用户降级到较旧的固件。

HTTP服务器漏洞

一些路由器可能正在运行过时/不安全的HTTP服务器,并且可能容易受到缓冲区溢出或其他攻击的影响。

网件

使用 netgear-telnetenable 许多网件设备都可以通过telnet进入,也可以查看 GitHub: insanid/NetgearTelnetEnable。如果无法使用这种方法,则可以尝试从启用了telnetd的供应商发布的源中刷新映像构建。

通过 nmrpflash许多网件设备可以被烧录,但是无法确定能够使用该工具的设备有哪些。

收集相关数据

WikiDevi上面许多信息可以被查询到,例如:FCC ID:十分的有用处当你搜寻文件的时候,datasheets和网络照片:能够无需打开机壳就能区分使用过的芯片。

通常可以使用以下的命令:

  dmesg                          # log buffer might be to small, see note 1.
  cat /proc/cmdline
  cat /proc/cpuinfo
  cat /proc/meminfo
  cat /proc/devices
  ls /sys/devices/platform
  cat /proc/mtd
  cat /sys/class/mtd/mtd*/offset # Linux 4.1 and newer, see note 2.
  ifconfig -a
  ls /sys/class/net
  brctl show
  cat /sys/kernel/debug/gpio     # GPIO information

注意1:通过dmesg检索时,如果日志的缓存区太小,就会丢失掉最早的信息。如果从供应商发布的资源中构建库存及镜像文件,则可以在内核配置中设置更大的缓冲区大小。

注意2:http://lxr.free-electrons.com/source/Documentation/ABI/testing/sysfs-class-mtd

获取设置LED信息的另一个有用的工具是gpiodump,它是MT7620 GPIOMODE寄存器转储器(RAMIPS)。

从设备获取数据

由于空间有限,常见的文件传输实用程序(例如rsync/curl/ssh/scp/ftp/http/tftp)可能不可用,精简版version/applet可能在busybox中可用。

假设路由器ip为192.168.0.123,要传输的文件位于/tmp/important-data.txt

HTTP通过”httpd”和”busybox mount”

如果从/www提供Web界面

Sender
mount -o bind /tmp /www

Receiver

wget http://192.168.0.123/important-data.txt

FTP通过“busybox ftpput”

Receiver

设置一个FTP服务器,添加一个具有写权限的匿名账号。

python -m pyftpdlib -w -p 21

Sender

busybox ftpput 192.168.0.123 important-data.txt /tmp/important-data.txt 

netcat通过“buxybox nc”

Receiver
busybox nc -l -p 12345 > important-data.txt 

Sender

cat /tmp/important-data.txt | busybox nc 192.168.0.123:12345

TFTP通过“busybox tftp”

Receiver

建立一个tftp服务器

Sender
busybox tftp -p -l /tmp/important-data.txt -r important-data.txt 192.168.0.123

通过终端(terminal)复制

如果上述所有工具/小工具都不可用,则可以从telnet终端进行复制,但不适用于二进制文件

【Openwrt】脚本自动部署守护进程

#!/bin/bash
openwrt(){
	echo "***************************************************"
	echo "*			Welcom to OpenWrt Platform				*"
	echo "***************************************************"

    # check_deps
    local source_dir="$PWD"
    local service_file="/etc/init.d/rulex.service"
    local executable="/usr/local/rulex"
    local working_directory="/usr/local/"
    local config_file="/usr/local/rulex.ini"
    local db_file="/usr/local/rulex.db"
cat > "$service_file" << EOL
#!/bin/sh /etc/rc.common

START=180

USE_PROCD=1

start_service() {
	procd_open_instance
	procd_set_param command "$executable run -config=$config_file -db=$db_file" 
	procd_set_param respawn 0
	procd_close_instance
}

stop_service(){
	service_stop "$executable"
}
EOL
	
	mkdir -p $working_directory
    chmod +x $source_dir/rulex
    cp -rfp "$source_dir/rulex" "$executable"
    cp -rfp "$source_dir/rulex.ini" "$config_file"
    
	chmod 777 $service_file
	$service_file enable 
	$service_file start 
	
    if [ $? -eq 0 ]; then
        echo "[√] Rulex service has been created and extracted."
    else
        echo "[x] Failed to create the Rulex service or extract files."
    fi
    exit 0
}

【Openwrt】lm-sensors-3-6-0 cannot find -liconv

当我们编译lm-sensors模块试会发现提示错误cannot find -liconv。

通过log分析试没有把相应的libconv.a库拷贝到lm-sensors lib里。

解决方式:

cp ./build_dir/target-aarch64_generic_musl/libiconv/libiconv.a ./build_dir/target-aarch64_generic_musl/lm-sensors-3-6-0/lib/

【Openwrt】lua的cgi响应 lua中获取GET/POST数据

一、lua的cgi响应 lua中获取GET/POST数据:

  1. 安装uhttpd包(https需要加装“uhttpd-mod-tls”和“px5g”);
  2. 修改uhttpd配置文件“/etc/config/uhttpd”,将Lua作为“interpreter”;
  3. Lua脚本写到“/www/cgi-bin/”目录下,但是不带扩展名,且可执行;
  4. Fast-CGI要求Lua脚本必须首先使用“io.write()”输出“Content-type: text/html\n\n”
  5. “/www/cgi-bin/”目录下的脚本可以调用“/usr/lib/lua/”目录下的自定义模块;
  6. Lua环境已经就绪。

二、以“读取GET和POST数据”为例,全部使用默认值的情况下,如何具体实现:

第一步:使用“opkg update”更新“.ipk”包的源,然后使用“opkg install uhttpd”安装;

第二步:使用“vi /etc/config/uhttpd”,在“config uhttpd main”下添加一行

list interpreter '.lua=/usr/bin/lua'

第三步:建立目录“/www/cgi-bin”,并增加“+x”属性;

root@OpenWrt:~# mkdir -p /www/cgi-bin/
root@OpenWrt:~# chmod +x /www/cgi-bin/

建立响应文件,并增加“+x”属性;

root@OpenWrt:~# touch /www/cgi-bin/webservice
root@OpenWrt:~# chmod +x /www/cgi-bin/webservice

将文件“/www/cgi-bin/webservice”内容修改为:

#!/usr/bin/lua
local WebService = require 'WebService'
WebService.Run()

第四步:建立Lua模块文件(不再要求“+x”属性),并读取参数,返回响应:

root@OpenWrt:~# touch /usr/lib/lua/WebService.lua

将其内容修改为如下内容:

local WebService = {}
 
function WebService.Run()
    local client = os.getenv("REMOTE_ADDR")
    local GET = os.getenv("QUERY_STRING")
    local POST = nil
    local POSTLength = tonumber(os.getenv("CONTENT_LENGTH")) or 0
    if (POSTLength > 0) then
        POST = io.read(POSTLength)
        --POST = io.read("*a")
    end
 
    -- Fast-CGI+HTTP require HEADER
    -- enable cache
    --io.write("Content-type: text/html\n\n")
    -- disable cache, especially for Internet Explorer
    io.write("Content-type: text/html\nPragma: no-cache\n\n")
 
    local reply = string.format("Client %s said: url: [%s], data: [%s]\n", client or '-', GET or '-', POST or '-')
    io.write(reply)
end
 
return WebService

第五步:重启“uhttpd”服务(为了让更改的/etc/config/uhttpd生效):

root@OpenWrt:~# /etc/init.d/uhttpd restart

第六步:使用浏览器测试:

使用浏览器访问如下地址:

http://<openwrt_ipaddr>/cgi-bin/webservice?author=qige

这里假设OpenWrt开发板的IP为192.168.1.24:

http://192.168.1.1/cgi-bin/webservice?author=qige

最终效果如下图:

通过cUrl模拟POST提交

通过form表单POST提交的浏览器结果

注意:

  1. POST数据可以由curl、Python requests等进行模拟提交,也可以自制如:<form action=”/cgi-bin/webservice” method=”POST”>提交;
  2. 根据Fast-CGI要求,必须要先使用“io.write()”输出http协议头部;再根据http协议的要求,头部和内容之间必须使用“\n\n”来隔开。因此Lua脚本必须先输出头部“Content-type: text/html\n\n”,再输出其它内容;
  3. 如果“不需要缓存”,输出立即过期,则修改头部内容为“Content-type: text/html\nPragma: no-cache\n\n”;
  4. 让uhttpd开机自动启动,需要执行“/etc/init.d/uhttpd enable”;
  5. 需要将接收到的数据输出到串口,可以再安装一个“coreutils-stty”包用于控制串口波特率
root@OpenWrt:~# opkg install coreutils
root@OpenWrt:~# opkg install coreutils-stty

再将以下内容添加到Lua模块的适当位置,并调用此函数即可:

function WebService.uartWrite(msg)
    local uartConfig = 'stty -F /dev/ttyS0 raw speed 9600\n'
    os.execute(uartConfig)
 
    local cmd = string.format("echo '%s' > /dev/ttyS0\n", msg or '')
    os.execute(cmd)
end

【OPENWRT】 RT5350 SPI I2C驱动简单说明

openwrt中已经支持 RT5350 的SPI I2C等驱动。

一、选择SPI、I2C 功能

-> Kernel modules
  -> SPI Support
  -> I2C support

二、修改设备树

vi target/linux/ramips/dts/rt5350.dtsi

 i2c@900 {
                        compatible = "link,rt5350-i2c", "ralink,rt2880-i2c";
                        reg = <0x900 0x100>;

                        resets = <&rstctrl 16>;
                        reset-names = "i2c";

                        #address-cells = <1>;
                        #size-cells = <0>;

                        pinctrl-names = "default";
                        pinctrl-0 = <&i2c_pins>;

                        status = "disabled";
                };

                spi@b00 {
                        compatible = "ralink,rt5350-spi";
                        reg = <0xb00 0x100>;

                        resets = <&rstctrl 18>;
                        reset-names = "spi";

                        #address-cells = <1>;
                        #size-cells = <1>;

                        pinctrl-names = "default";
                        pinctrl-0 = <&spi_pins &spi_cs1>;

                        status = "disabled";
                };

配置文件默认是不启用 SPI I2C 的。我们需要把 status = “disabled”; 改为 status = “okay”;对于 I2C,我们还要修改模板设备树文件:

pinctrl {
                state_default: pinctrl0 {
                        gpio {
                                ralink,group = "i2c", "jtag", "rgmii", "mdio", "uartf";
                                ralink,function = "gpio";
                        };
                };
        };

复用功能”i2c”,”jtag”, “rgmii”, “mdio”, “uartf” 等默认都复用为 gpio 口,要启用 I2C,需要去掉 i2c。同样,我们还需要启用 uartf。所有,修改为:

pinctrl {
                state_default: pinctrl0 {
                        gpio {
                                ralink,group =  "jtag", "rgmii", "mdio";
                                ralink,function = "gpio";
                        };
                };
        };

【openwrt】Openwrt配置串口登录密码

Openwrt15.05配置串口登录密码

一、修改busybox

make menuconfig选择

Base system —>
	<*> busybox ……
		[*] Customize busybox option
			Login/Password Management Utilities —>
				[*] getty
				[*] login (NEW)

二、修改启动脚本package/base-files/files/etc/inittab

vim inittab

::askconsole:/bin/ash --login

改为

::askconsole:/bin/login

三、修改 vi target/linux/ramips/base-files/etc/inittab

::askconsole:/bin/ash --login

改为

::askconsole:/bin/login

重新编译。

Openwrt18.06配置串口登录密码

一、修改busybox

make menuconfig选择

Base system —>
	<*> busybox ……
		[*] Customize busybox option
			Login/Password Management Utilities —>
				[*] getty
				[*] login (NEW)

二、修改启动脚本package/base-files/files/usr/libexec

vim login.sh

[ "$(uci -q get system.@system[0].ttylogin)" = 1 ] || exec /bin/ash --login

改为

[ "$(uci -q get system.@system[0].ttylogin)" = 1 ] || exec /bin/login

重新编译。

【Openwrt】实现本地域名访问路由器

一、路由器上修改方式

  vi /etc/hosts

  127.0.0.1 localhost
  192.168.1.1 recologypower.com

二、openwrt编译环境修改方式

 vi package/base-files/files/etc/hosts


  127.0.0.1 localhost
  192.168.1.1 recologypower.com