spi-flash系统生成需要进行四部曲: “uboot” 、 “dtb” 、“kernel” 和 “rootfs” 。以16M flash举例, 介绍 spi flash 的适配过程。 分区表如下:
| 分区序号 | 分区大小 | 分区作用 | 地址空间及分区名 |
| mtd0 | 1MB (0x100000) | spl+uboot | 0x0000000-0x0100000 : “uboot” |
| mtd1 | 64KB (0x10000) | dtb文件 | 0x0100000-0x0110000 : “dtb” |
| mtd2 | 4MB (0x400000) | linux内核 | 0x0110000-0x0510000 : “kernel” |
| mtd3 | 剩余 (0xAF0000) | 根文件系统 | 0x0510000-0x1000000 : “rootfs” |
一、安装交叉编译环境
# 此处为获取7.2.1版本,您可获取其他版本或者通过链接直接下载
wget http://releases.linaro.org/components/toolchain/binaries/7.2-2017.11/arm-linux-gnueabi/gcc-linaro-7.2.1-2017.11-x86_64_arm-linux-gnueabi.tar.xz

tar -vxJf gcc-linaro-7.2.1-2017.11-x86_64_arm-linux-gnueabi.tar.xz
sudo cp -r ./gcc-linaro-7.2.1-2017.11-x86_64_arm-linux-gnueabi /opt/

sudo vim /etc/bash.bashrc

# 在文件末尾 添加以下内容
PATH="$PATH:/opt/gcc-linaro-7.2.1-2017.11-x86_64_arm-linux-gnueabi/bin"
# 添加完毕

# 使路径生效
source /etc/bash.bashrc
此时可用 arm-linux-gnueabi-gcc -v 进行测试;若普通用户状态下没有成功,通过 sudo su 切换到root用户再尝试;
二、uboot配置及编译
1、从GitHub下载uboot源码
sudo apt-get install git
git clone https://github.com/Lichee-Pi/u-boot.git
cd u-boot

# 查看分支
git branch -a
# 切换到 Nano 分支
git checkout nano-v2018.01
2、uboot源码结构
.
├── api             //封装一些平台无关的操作,如字符串打印,显示,网络,内存
├── arch            //以平台架构区分
│   ├──arm
│   │   └──cpu
│   │   │   └──arm926ejs
│   │   │   │   └──sunxi   //cpu相关的一些操作,如定时器读取
│   │   │   │   │   └──u-boot-spl.lds  //spl的放置方法
│   │   └──dts
│   │   │   └──suniv-f1c100s-licheepi-nano.dts   // f1c100s芯片的一些配置
│   │   │   └──suniv-f1c100s-licheepi-nano.dtb
│   │   │   └──suniv-f1c100s.dtsi
│   │   │   └──suniv.dtsi
│   │   └──lib      //一些库文件
│   │   └──mach-sunxi
│   │   │   └──board.c          //board_init_f
│   │   │   └──dram_sun4i.c     //ddr的操作,复位,时钟,延时,odt,etc.
│   │   │   └──dram_helpers.c   //ddr的设置及读写测试
├── board
│   ├──sunxi
│   │   └──board.c              //sunxi_board_init 入口
│   │   └──dram_suniv.c        //DRAM的一些默认参数
├── cmd             //Uboot命令行的一些命令
├── common          //含spl
├── configs         //menuconfig里的默认配置,比如各类驱动适配
│   ├── licheepi_nano_defconfig
│   ├── licheepi_nano_spiflash_defconfig
├── disk            //硬盘分区的驱动
├── doc
├── drivers         //外设驱动
├── dts
├── examples
├── fs              //多种文件系统
├── include
│   ├──configs
│   │   └──sunxi_common.h   //预配置的参数,如串口号等
│   │   └──suniv.h
├── lib             //加密压缩等算法
├── net             //nfs,tftp等网络协议
├── post
├── scripts
3、uboot配置
# 此处告知make采用arm-linux-gnueabi下的所有交叉编译工具,目标架构为Arm,设定各项默认配置为 nano 的spiflash支持版
make ARCH=arm CROSS_COMPILE=arm-linux-gnueabi- licheepi_nano_spiflash_defconfig

# 若不带spi-flash的板子,请换成 licheepi_nano_defconfig

修改文件uboot源码目录下 进入 ./include/configs/suniv.h
#define CONFIG_BOOTCOMMAND   "sf probe 0:50000000; "                 \
                             "sf read 0x80C00000 0x100000 0x4000; "  \
                             "sf read 0x80008000 0x110000 0x400000; " \
                             "bootz 0x80008000 - 0x80C00000"

# 进行可视化配置
make ARCH=arm menuconfig

#取消勾选 [ ] Enable a default value for bootcmd
#勾选 [*] Enable boot arguments;
#在下方一项中填入 bootargs 参数:
console=ttyS0,115200 panic=5 rootwait root=/dev/mtdblock3 rw rootfstype=jffs2
#(root=/dev/mtdblock3 指的是mtd设备第三分区,分区指定在dts中声明)
4、添加LCD支持
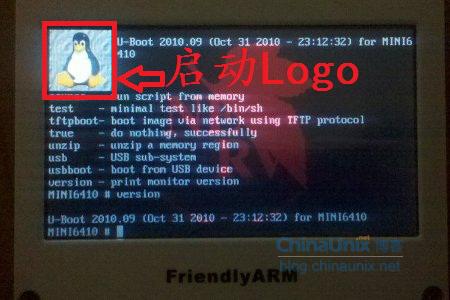
ARM architecture ‣ Enable graphical uboot console on HDMI, LCD or VGA 为 Y
#接着配置同级的 LCD panel timing details 为:
#分辨率800*480
x:800,y:480,depth:18,pclk_khz:33000,le:87,ri:40,up:31,lo:13,hs:1,vs:1,sync:3,vmode:0
#分辨率480*272
x:480,y:272,depth:18,pclk_khz:10000,le:42,ri:8,up:11,lo:4,hs:1,vs:1,sync:3,vmode:0
并将 LCD panel backlight pwm pin 设为:PE6 (管脚参照原理图)
5、uboot编译
make ARCH=arm CROSS_COMPILE=arm-linux-gnueabi- -j4
编译完成后,可一看到目录下多了一堆以u-boot带头的文件,我们只需取 u-boot-sunxi-with-spl.bin 即可。
三、Linux配置及编译
1、从GitHub下载Linux源码
#下载代码
git clone --depth=1 -b f1c100s-480272lcd-test https://github.com/Icenowy/linux.git
下载配置文件:
下载 .config 文件,放入源码主目录进行替换 (若下载时文件名有变,请重命名回 .config );
2、DTS修改
修改内核源码目录下的 ./arch/arm/boot/dts/suniv-f1c100s-licheepi-nano.dts
&spi0 {
    pinctrl-names = "default";
    pinctrl-0 = <&spi0_pins_a>;
    status = "okay";
    spi-max-frequency = <50000000>;
    flash: w25q128@0 {
        #address-cells = <1>;
        #size-cells = <1>;
        compatible = "winbond,w25q128", "jedec,spi-nor";
        reg = <0>;
        spi-max-frequency = <50000000>;
        partitions {
            compatible = "fixed-partitions";
            #address-cells = <1>;
            #size-cells = <1>;

            partition@0 {
                label = "u-boot";
                reg = <0x000000 0x100000>;
                read-only;
            };

            partition@100000 {
                label = "dtb";
                reg = <0x100000 0x10000>;
                read-only;
            };

            partition@110000 {
                label = "kernel";
                reg = <0x110000 0x400000>;
                read-only;
            };

            partition@510000 {
                label = "rootfs";
                reg = <0x510000 0xAF0000>;
            };
        };
    };
};
此处在dts中为mtd设备预先划分好了分区内容,内核将会自动解析 。
3、内核配置修改
#打开可视化配置窗口
make ARCH=arm menuconfig
勾选 File systems ‣ Miscellaneous filesystems ‣ Journalling Flash File System v2 (JFFS2) support 。
勾选 Device Drivers -> Memory Technology Device (MTD) support ,及下面子项:
- Caching block device access to MTD devices #为了生成/dev/mtdblock*设备,不选会报错
勾选 Device Drivers -> SPI support ,及下面子项:
Allwinner A31 SPI Controller  (勾选)
Allwinner A10 SoCs SPI controller   (不勾选)
修改源码下的 ./drivers/mtd/ spi-nor/ spi-nor.c
修改对应spi-flash;如 w25q128 :
{ "w25q128", INFO(0xef4018, 0, 64 * 1024, 256, SECT_4K) },
// 修改为 (不使用sector,使用块擦除):
{ "w25q128", INFO(0xef4018, 0, 64 * 1024, 256, 0) },
4、内核编译
make ARCH=arm CROSS_COMPILE=arm-linux-gnueabi- -j4 #请自行修改编译线程数
生成的 zImage 在 arch ‣ arm ‣ boot 目录下
编译工具链为 arm-linux-gnueabi,工具链的安装请参考 uboot 编译部分 。
四、DTB文件编译
进入Linux目录,执行如下代码:
设备树在源码的 linux ‣ arch ‣ arm ‣ boot ‣ dts ‣ suniv-f1c100s-licheepi-nano.dts;
make ARCH=arm CROSS_COMPILE=arm-linux-gnueabi- dtbs -j4
生成的 dtb文件 在 dts同级目录下 。
五、根文件系统编译
1、下载依赖包
apt-get install linux-headers-$(uname -r)
2、buildroot下载配置
wget https://buildroot.org/downloads/buildroot-2017.08.tar.gz
tar xvf buildroot-2017.08.tar.gz
cd buildroot-2017.08/
make menuconfig
Target options  --->

    Target Architecture Variant (arm926t)  --->   // arm926ejs架构
[ ] Enable VFP extension support                  // Nano 没有 VFP单元,勾选会导致某些应用无法运行
    Target ABI (EABI)  --->
    Floating point strategy (Soft float)  --->    // 软浮点

System configuration  --->

    (Lichee Pi) System hostname                   // hostname
    (licheepi) Root password                      // 默认账户为root 密码为licheepi
    [*] remount root filesystem read-write during boot  // 启动时重新挂在文件系统使其可读写
3、编译
若编译时,buildroot下载软件包速度太慢,请下载 dl.zip ,将其中的软件包解压至 buildroot ‣ dl 下;
#编译命令:
make
编译完成的镜像包,是在 buildroot-2017.08 ‣ output ‣images ‣ rootfs.tar 中找到 。
六、一键打包生成SPIflash固件脚本
脚本下载:
把.txt改成.sh。